When you are going to take up a new hobby, you always need a closer look before you start. Sewing is a great option as it is not only leisure with pleasure but also plenty of creative and useful options.
However, you can’t start using a sewing machine until you thread it. At first, it may sound scary, but all that you need is just some patience and practice. The first setup can be a bit complicated, but you will get soon more experience with some sewing projects. And finally, threading a sewing machine will become a piece of cake for you.
So, we will share some good tips on how to thread a sewing machine.
Contents
How to thread a sewing machine?
Before you start threading a sewing machine, read your manual. Some differences depend on the brand and model of the sewing machine, so you need to know all the details about it.
If you don’t know how to thread a sewing machine properly, remember that you need to load both an upper thread and the lower thread into your machine.

What do you need to thread a sewing machine?
Although the process seems to be complicated, you don’t need much to thread a sewing machine. Here is a short list of what you need for this:
- Sewing machine
- Thread
- Small scissors or snips
- Needle threader (optional)

What are the steps to threading a sewing machine?
1. Load the top thread
The first thing you have to do is to load a spool with the upper thread. This is one of the easiest steps in the whole process. So, let’s start!
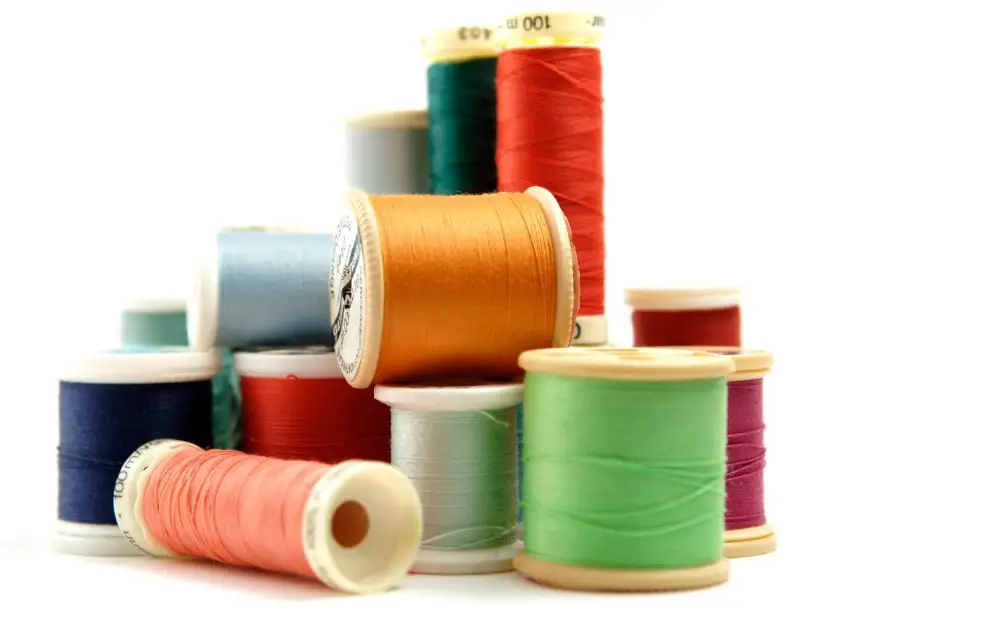
Choose a spool of thread you want to use in the sewing machine. Pay attention to the color and material of your thread. Opt for a cotton or polyester thread, as both of them work best in the sewing machine. Avoid silk threads as they are easy to tear in the process.
Place the top thread spool on the spool pin that sits on the top right of the sewing machine. Usually, the spool pin is a vertical stick, but some machines have a horizontal spool pin.
Secure the upper thread spool with a spool cap, if you have one.
2. Guide the thread
Look at the upper left of your sewing machine. Here is the mechanism called an upper thread guide. In most cases, it looks like a narrow piece of metal or plastic with a slot for the thread guiding. It is marked with numbers that hint to you the right way to guide the upper thread.
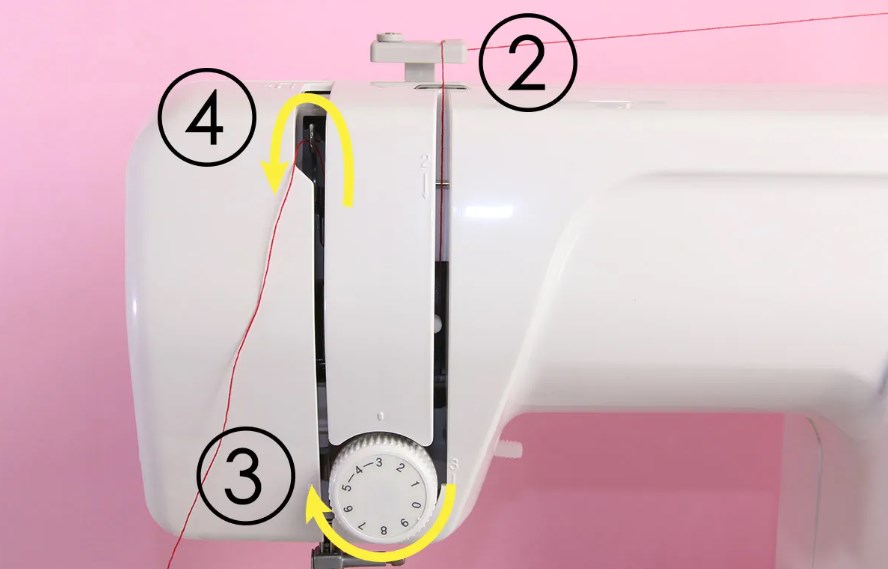
This mechanism guides your sewing thread from the thread spool to the tension discs. Follow the numbers and guide thread through the tabs on your sewing machine. Start bringing your thread from the top of the sewing machine, where you can see the thread hooks. Loop it around the tension knob and pull the thread back up again. It will be the second thread guide.
This part has the takeup lever with an eyelet where the thread guides through. In this way, you create the U-shape thread guide.
When you bring the thread through the first and second guides, the proper tension of your working thread matters. So, we can focus a bit on this part in the next step.

3. Tense and control the thread
Proper thread tension is important for the best sewing. If the tension is not strong enough, you will have some skipped stitches or seam puckering when sewing.
Bring the thread down from the upper thread guide and loop it around the tension dial. This part usually contains the hidden tension discs that regulate the tension of the thread. In some machines, the tension discs are placed below the upper thread guide, so you have to make an extra loop to create the tension.
To control the proper tension, do it with the hand wheel on your sewing machine. Ensure that the take-up lever is in the upper position. Guide the thread through the small hole in the take-up lever and fix it.
Proceed with the second thread guide. When you place a thread on the needle section of your sewing machine, you can see the two small wire hooks. Guide the thread through them. One of them sits below the take-up lever, and the second one is a part of the shaft with the needle clamp.
4. Thread the needle
Look at the lower part of your sewing machine. You can see some metal hooks below the hand wheel. Bring the thread down through them to fix it. Then, pull it down to the sewing machine needle.
Before you thread the needle, ensure it is securely placed in the needle clamp. A good idea is to lower the presser foot to the needle plate. It allows you more space to see while threading the needle.
For better threading, the thread end should be smooth, clear, and finely cut. Use small sharp scissors to make a smooth and clean cut of the thread end.
In the sewing machine needles, a needle hole, or a needle eye, is located at the sharp end of the needle. Thread the needle eye from front to back, and gently pull the thread. Keep doing it until you leave several inches of thread behind the needle.
Some sewing machines have an automatic needle threader, so you can thread your needle following the steps given in your manual.
5. Thread bobbin
This bobbin is the lower spool of thread in your sewing machine. For the full sewing machine threading, you need to wound the bobbin with the same thread you use as the upper thread.
The ways to insert the bobbin are different. In some machines, you have a top-loading bobbin, and in others, you have to load it from the front. Some more machines have a removable case where you can insert the bobbin, and in some cases, you can drop it straight down into the fixed position.
The bobbin case usually comes with your sewing machine, but you can find it as well in the bobbin compartment.
For the proper threading, you need to catch the lower thread and join it to the upper one. So, if you haven’t wound the bobbin thread before, wind it now from the existing spool of thread.
Pull the thread to the left side of your machine. Then, wind it counter-clockwise around the pre-tension disc that is attached to the thread guide. Bring the thread through the two small holes in the empty bobbin case. Wind it around the bobbin’s center pillar.
Insert the bobbin into the bobbin winder pin. You can find it on the top-right side of your sewing machine, near the spool holder. Then press the foot pedal and start the bobbin winding. Keep winding it until the bobbin case is full.
To detach the bobbin thread from the upper spool, trim it with small scissors.
If your bobbin case is already full, skip the step above. Just load the bobbin case into the machine. Raise the needle and the presser foot to the highest position with a hand wheel or button to open the bobbin holder. Place a bobbin case in the round slot following the arrow inside.
Now, gently pull the bobbin thread through the tension spring and place the bobbin cover.
6. Join the threads
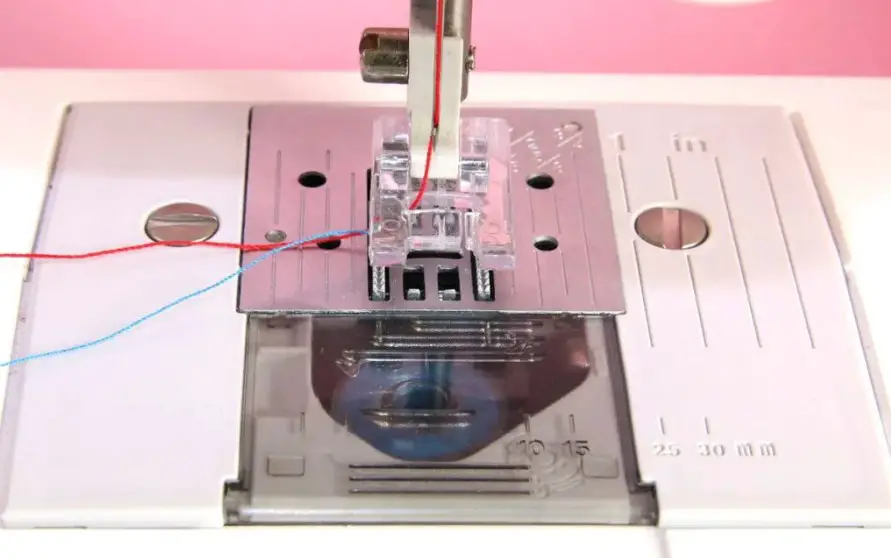
The next step is the thread catch. Turn the hand wheel, so the needle hooks up the bobbin thread with the upper one. Bring the bobbin thread to the machine plate. Pull both threads slowly to the back and make them run freely.

7. Test on a piece of fabric
Make your first stitch to check if everything is tip-top. Lower the presser foot and try to stitch on a scrap of fabric. Try the different fabrics and stitch options for better results.
What is the easiest way to thread a sewing machine needle?
If your sewing machine has an automatic needle threader, that is the easiest tip on how to thread a sewing machine. If not, do it yourself. Just trim your thread and make a clear tip.

How do you thread a small sewing machine?
Mini sewing machines are easy to use, but a bit different to thread. So, how to thread a sewing machine of a small size?
Here are the basic tips on small sewing machine threading:
- Place the top spool
- Guide the thread and bring it through the tension discs
- Thread the needle
- Load the bobbin thread
- Pull the bobbin thread up

What if your sewing machine works wrong?
Sometimes your first stitches can be tangled, skipped, and puckered. Is your sewing machine broken down?

In most cases, you have no problem with the sewing machine. To troubleshoot this issue, re-thread a sewing machine. If you thread it wrong before, it can cause some issues when sewing.
However, proper re-threading usually helps in such cases.

Final thoughts
Threading a sewing machine is quite easy when you follow all the steps above. When you know for sure how to thread a sewing machine, you can think of any projects and enjoy sewing!
Read also: What is a Serger Sewing Machine?

Hi everyone and welcome to my blog!
My name is Liz, and I started sewing when my son was born. First I repaired the holes in children’s pants, then I dared to do more challenging projects like sewing home decor and children’s clothing. Now it is my hobby where I come to rest, let my creativity run wild, and create things that please me and enhance my home.
I would love to help other sewing beginners and enthusiasts through my blog by sharing tips and tricks for this great hobby.
